MacOS开启HiDPI分辨率
目录
由于要修改系统文件,存在一定的风险,一定记得备份!!!
选择方案
开启hidpi分辨率的方法有3种
- 使用软件 SwitchResX
- 使用自动脚本 Enable-HiDPI-OSX
- 手工替换配置文件
第一种方法,软件要付费,卸载麻烦
第二种方法,实际运行时发现了一个 Bug issues#32 导致有的机器没有效果🙄
其实第二第三的原理都是一样的,手工也麻烦不了多少,这里还是手工替换配置文件。
详细步骤
1. 启用HiDPI模式
sudo defaults write /Library/Preferences/com.apple.windowserver.plist DisplayResolutionEnabled -bool true
2. 检测你的显示器
ioreg -l | grep "DisplayProductID" && ioreg -l | grep "DisplayVendorID"
结果形如:
    | |   | | |       "DisplayProductID" = 4845
    | |   | | |       "DisplayVendorID" = 1711
3. 自定义配置文件
在线工具
修改左侧的 DisplayProductID 和 DisplayVendorID 数字填上面生成的
  <key>DisplayProductID</key>
  <integer>4845</integer>
  <key>DisplayVendorID</key>
  <integer>1711</integer>
右侧生成对应的16进制数,是为要使用的文件名
DisplayProductID  (0x12ed)16 = (4845)10
DisplayVendorID	  (0x6af)16  = (1711)10
添加想要的分辨率,常用的为 1440x810, 1600x900, 1920x1080 ( 16:9屏幕 )
4. 下载plist并复制到系统文件夹
配置好后点击下载
运行指令复制到到 /System/Library/Displays/Contents/Resources/Overrides/
10.10 版本及以下为 /System/Library/Displays/Overrides/
sudo cp ~/Downloads/DisplayProductID-12ed.plist /System/Library/Displays/Contents/Resources/Overrides/DisplayVendorID-6af/DisplayProductID-12ed
把里面的 ID DisplayProductID-{{$}}和DisplayVendorID-{{$}} 换成上面自己生成的
配置结构是这样的
./DisplayVendorID-6af
└── DisplayProductID-12ed
如果你无法使用 sudo 那你可能需要禁用系统完整性保护
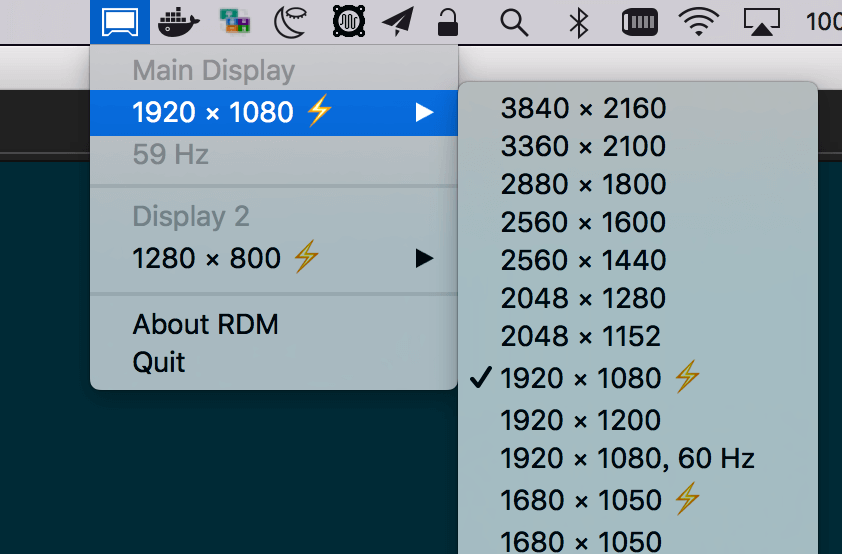
5. 重启 使用RDM切换分辨率
下载 RDM
重启后运行RDM,在任务栏中找到RDM的logo,点开来切换分辨率。带有⚡️标识的为HiDPI分辨率。

